Storing a bicycle in a home or apartment isn’t just a practical task — it’s also a design challenge. You could hide your bike in a closet or on the balcony, but it’s far more interesting to turn it into a part of your interior. A wall-mounted bike rack that you build yourself can be stylish, functional, and perfectly suited to your home.
In this article, you’ll learn how to make a bike rack with your own hands — no professionals needed. We’ll cover materials, planning, and give you a step-by-step guide to creating a practical and visually appealing rack.
Why make your own when there are so many racks in stores? The DIY approach means customization, creativity, and uniqueness. Here are the key benefits:
Cost-effective — homemade racks are often cheaper than designer models
Unique — your creation will be one-of-a-kind
Tailored — you can adjust dimensions, colors, and style to match your bike and room
Satisfying — building something yourself is rewarding and fun
Plus, a handmade rack adds a personal, artisanal touch to your space — something both functional and decorative.
Before you pick up the tools, it’s important to consider a few technical and aesthetic details:
Bike weight — especially important if your wall is drywall
Wall material — brick, concrete, wood, or drywall each need different anchors
Bike size — make note of the frame length and handlebar width
Usage frequency — if you ride daily, choose a design that makes access quick
Mounting height — ideally, your bike should be at eye level or slightly higher to avoid clutter
Here’s a basic list of tools and materials you’ll need for a simple wall-mounted wooden rack:
-
A wooden board or beam (40–60 cm long, about 20 cm wide, 3–4 cm thick)
-
Brackets or metal angles for wall mounting
-
Drill or rotary hammer
-
Wall plugs or anchor bolts, depending on wall type
-
Jigsaw or hand saw, if making a notch for the frame
-
Sandpaper or a sander for smoothing wood
-
Wood stain, varnish, or paint for finishing
-
Felt, rubber, or furniture pads to protect your bike from scratches
For more advanced builds, you can use welding, plywood, leather straps, or PVC/metal piping.
Here’s a table to help choose the right rack for your type of bike:
| Type of Bike | Recommended Mount Type | Special Considerations |
|---|---|---|
| City bike | Horizontal wall rack | Great for everyday use |
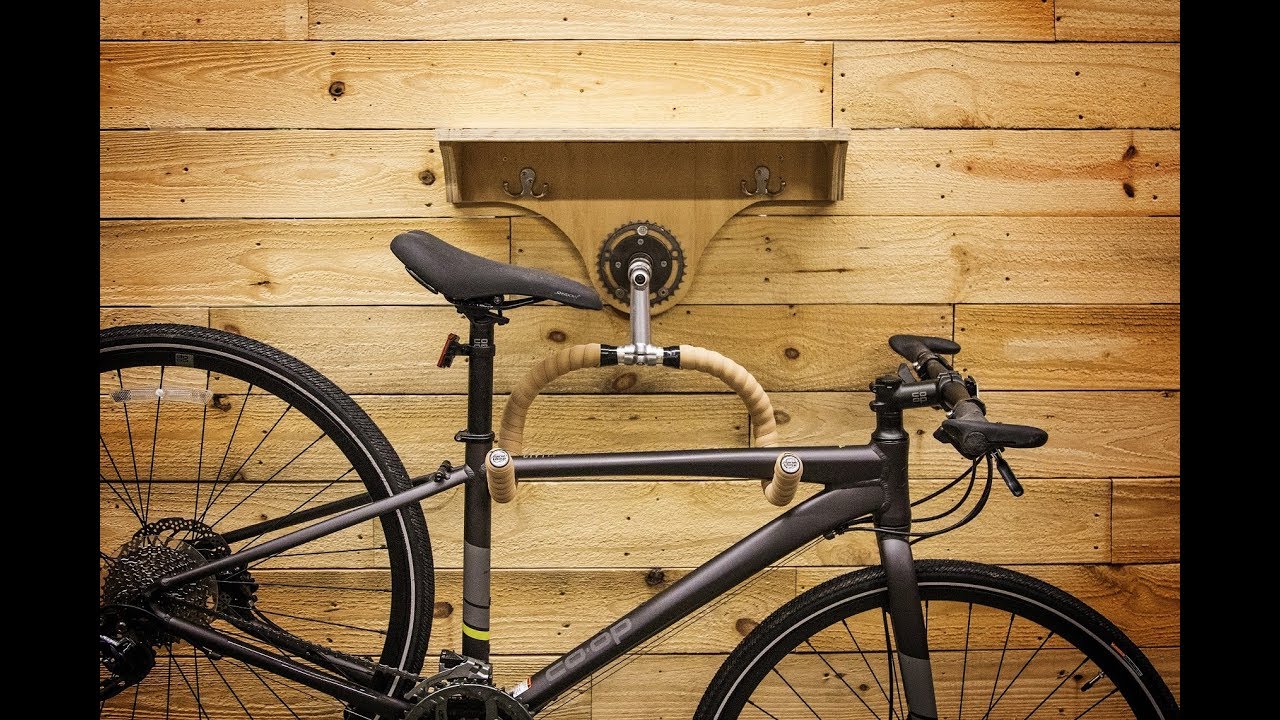
| Road bike | Minimalist shelf | Lightweight, easy to hang from top tube |
| Mountain bike | Reinforced vertical mount | Heavy, wide tires require strong support |
| Folding bike | Hook or wall loop | Compact and easy to store in small spaces |
| E-bike | Combined wall + floor support | Needs extra support due to battery weight |
Now let’s build a classic horizontal wooden bike rack from scratch.
Step 1: Prepare your wood
Choose strong wood like oak, beech, or treated pine. Sand all surfaces, especially the corners and edges to avoid splinters or damage to your bike frame.
Step 2: Mark and cut
Mark the center of your board and cut a notch for the bike frame (if needed). The notch should be about 5–6 cm wide and 3–4 cm deep. Sand the cut edges smooth.
Step 3: Finishing touches
Apply stain or paint that matches your room. Once it dries, seal with a coat of varnish.
Step 4: Mount to the wall
Drill holes in both the board and the wall. Use a spirit level to ensure it’s perfectly horizontal. Secure with anchor bolts.
Step 5: Protection and test
Add felt or rubber padding where the bike touches the rack. Carefully place your bike and check that it’s stable, balanced, and easy to access.
Congratulations! You’ve now built a custom rack that’s functional and adds style to your space.
Want to go beyond a basic rack? Here are some creative variations:
Wall shelf with a built-in slot for the bike
Leather strap hanger for a vintage or loft-style look
Industrial metal pipe mount for a raw aesthetic
PVC pipe frame for a budget-friendly option
Decorative wall panel with a hidden hook for artistic appeal
To blend the rack into your space, follow these styling tips:
Match materials — wood goes with wood, metal with metal
Play with contrast — a dark rack on a light wall (or vice versa) can pop
Add functions — integrate a shelf, hooks, or a small drawer for accessories
Use lighting — LED strips can highlight your bike like a piece of art
Here’s a two-part list of tips: what to do, and what to avoid when making your own bike rack.
Do:
-
Use quality materials
-
Double-check the strength of your mounting system
-
Adjust the height based on your own height and bike use
-
Add protection where your bike touches the rack
-
Consider both function and style in your design
Avoid:
-
Mounting to drywall without proper reinforcement
-
Using weak screws for heavy bikes
-
Placing the rack too high — it’ll be hard to use
-
Leaving wood untreated — could scratch your frame
-
Installing near heaters or direct sunlight — can damage your bike
Creating a stylish and secure DIY bike rack is a great way to save space, express your personality, and add something unique to your interior. You don’t need to be a carpenter or have a workshop — just a few tools, some creativity, and the motivation to make your home both functional and personal.
Your bike shouldn’t be hidden behind a door — give it the place it deserves. And do it your way.
Leave a Reply